APPROVE for Volusion 
Overview
This guide describes how to integrate APPROVE into a Volusion website.
APPROVE Volusion Integration
The APPROVE Volusion integration will consist of 2 steps.
| Topic | Overview |
|---|---|
| Requirements | - Ability to log into Volusion admin panel - Familiarity with basic javascript and jQuery programming techniques |
| Technical Level | |
| Available Features | - Embedded App APPROVE Integration Types - Button, Teaser Rate, and Hide APPROVE Tags |
| Implementation Overview | I. Loading APPROVE into your site. II. Placing finance buttons on products and checkout cart. |
(I) Loading APPROVE into your site
- Log into the Volusion
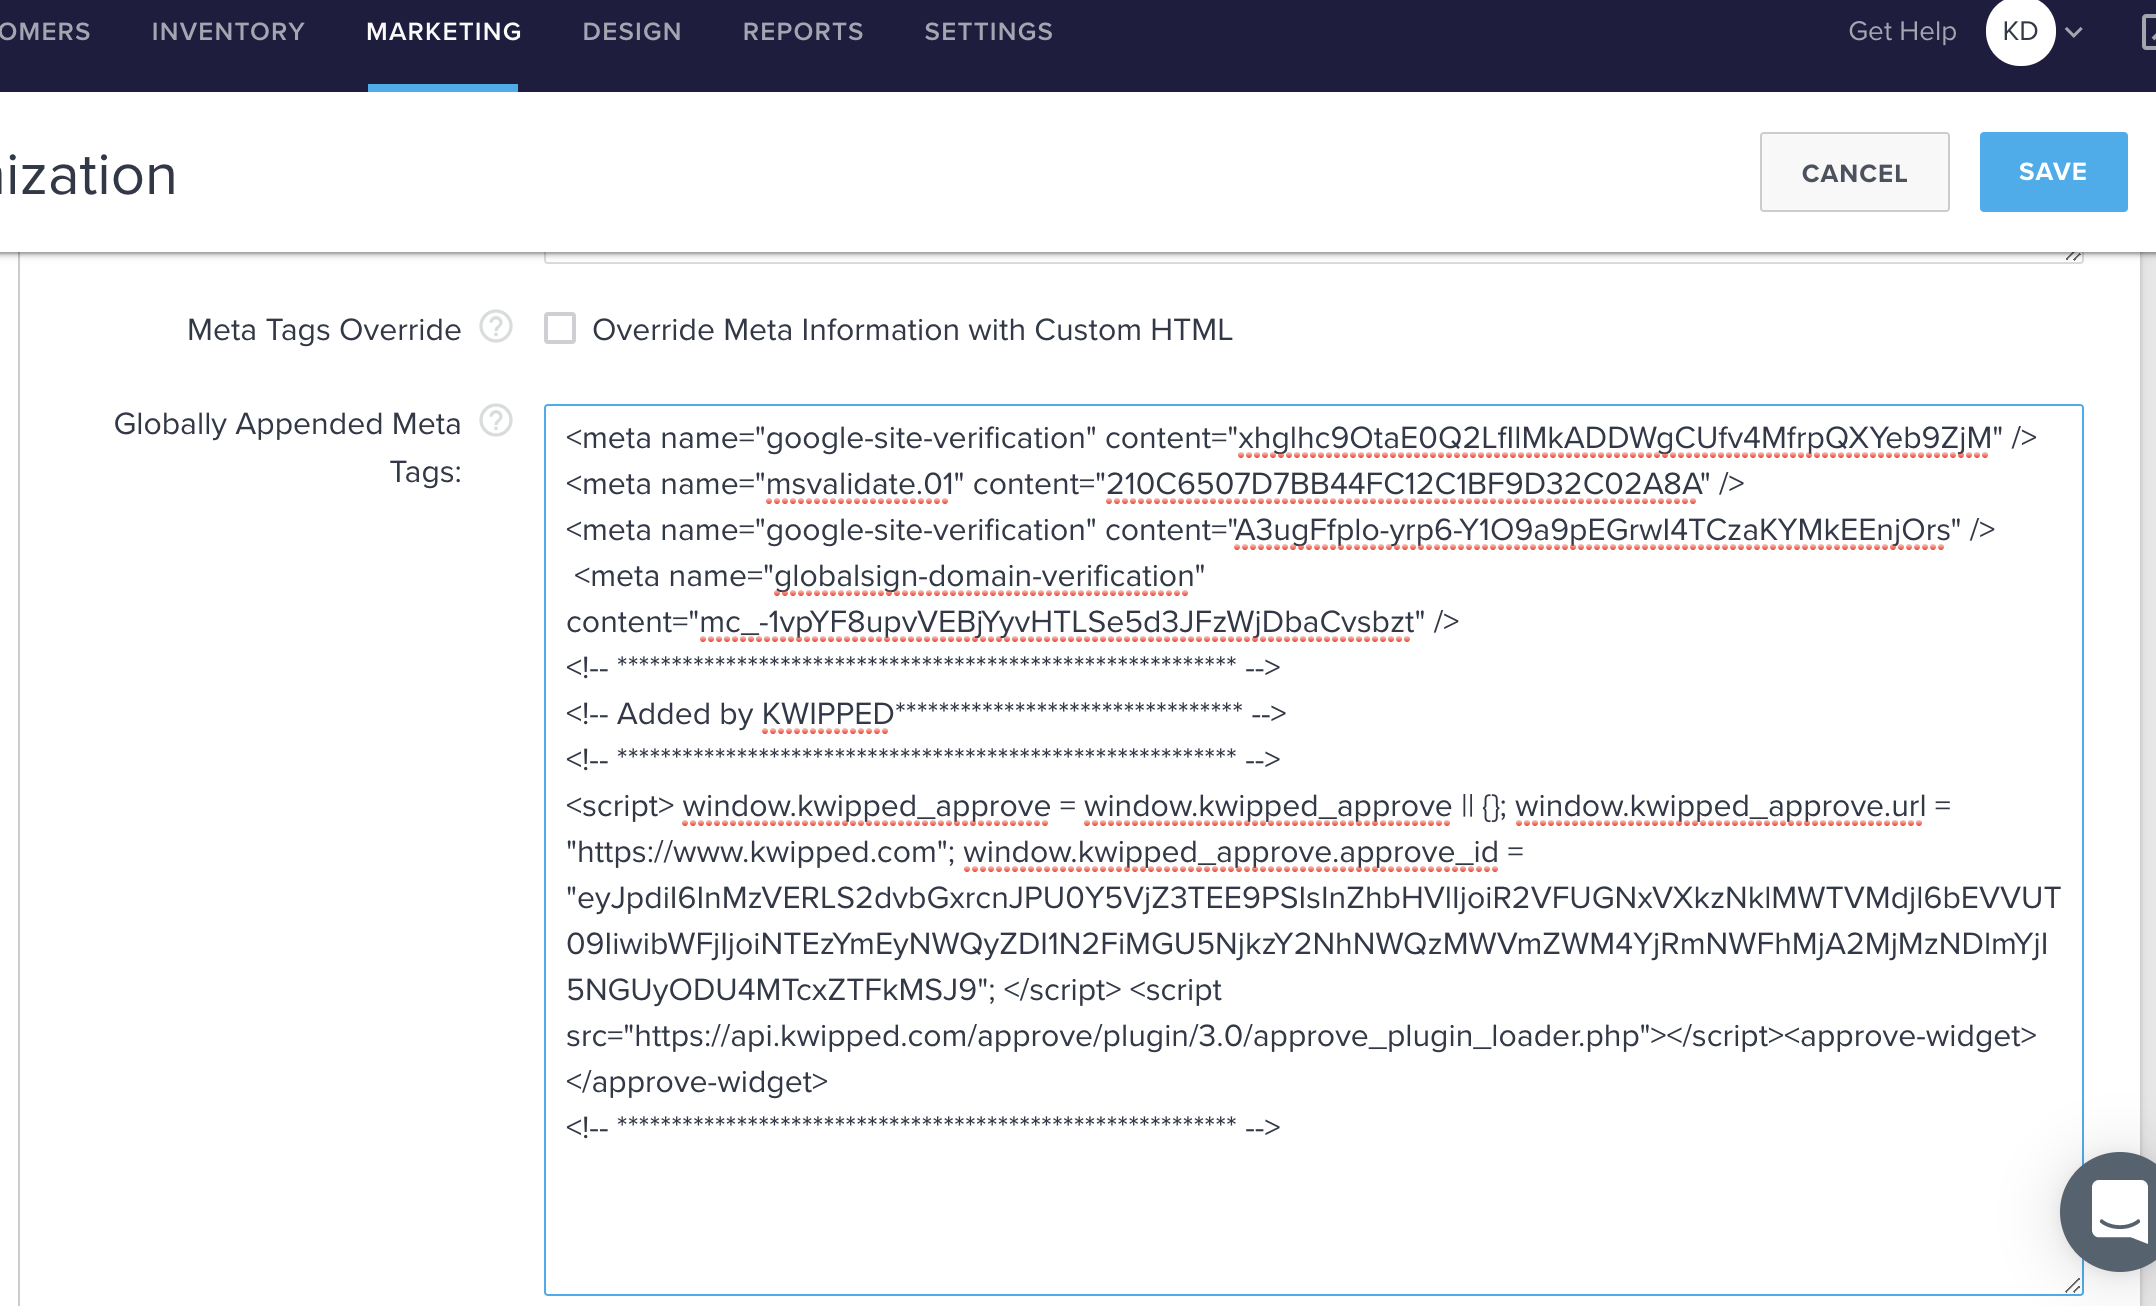
- Click on MARKETING, then SEO
- Add the APPROVE plugin code coped directly from your APPROVE account into Globally Appended Meta Tags

Example of code that should be pasted into Globally Appended Meta Tags:
<script>
    window.kwipped_approve = window.kwipped_approve || {};
    window.kwipped_approve.url = "https://www.kwipped.com";
    window.kwipped_approve.approve_id = "XXXXXX";
</script>
<script src="https://api.kwipped.com/approve/plugin/3.0/approve_plugin_loader.php"></script>
<approve-widget></approve-widget>- Save changes.
(II) Placing finance buttons on products and checkout cart
- Log into the Volusion
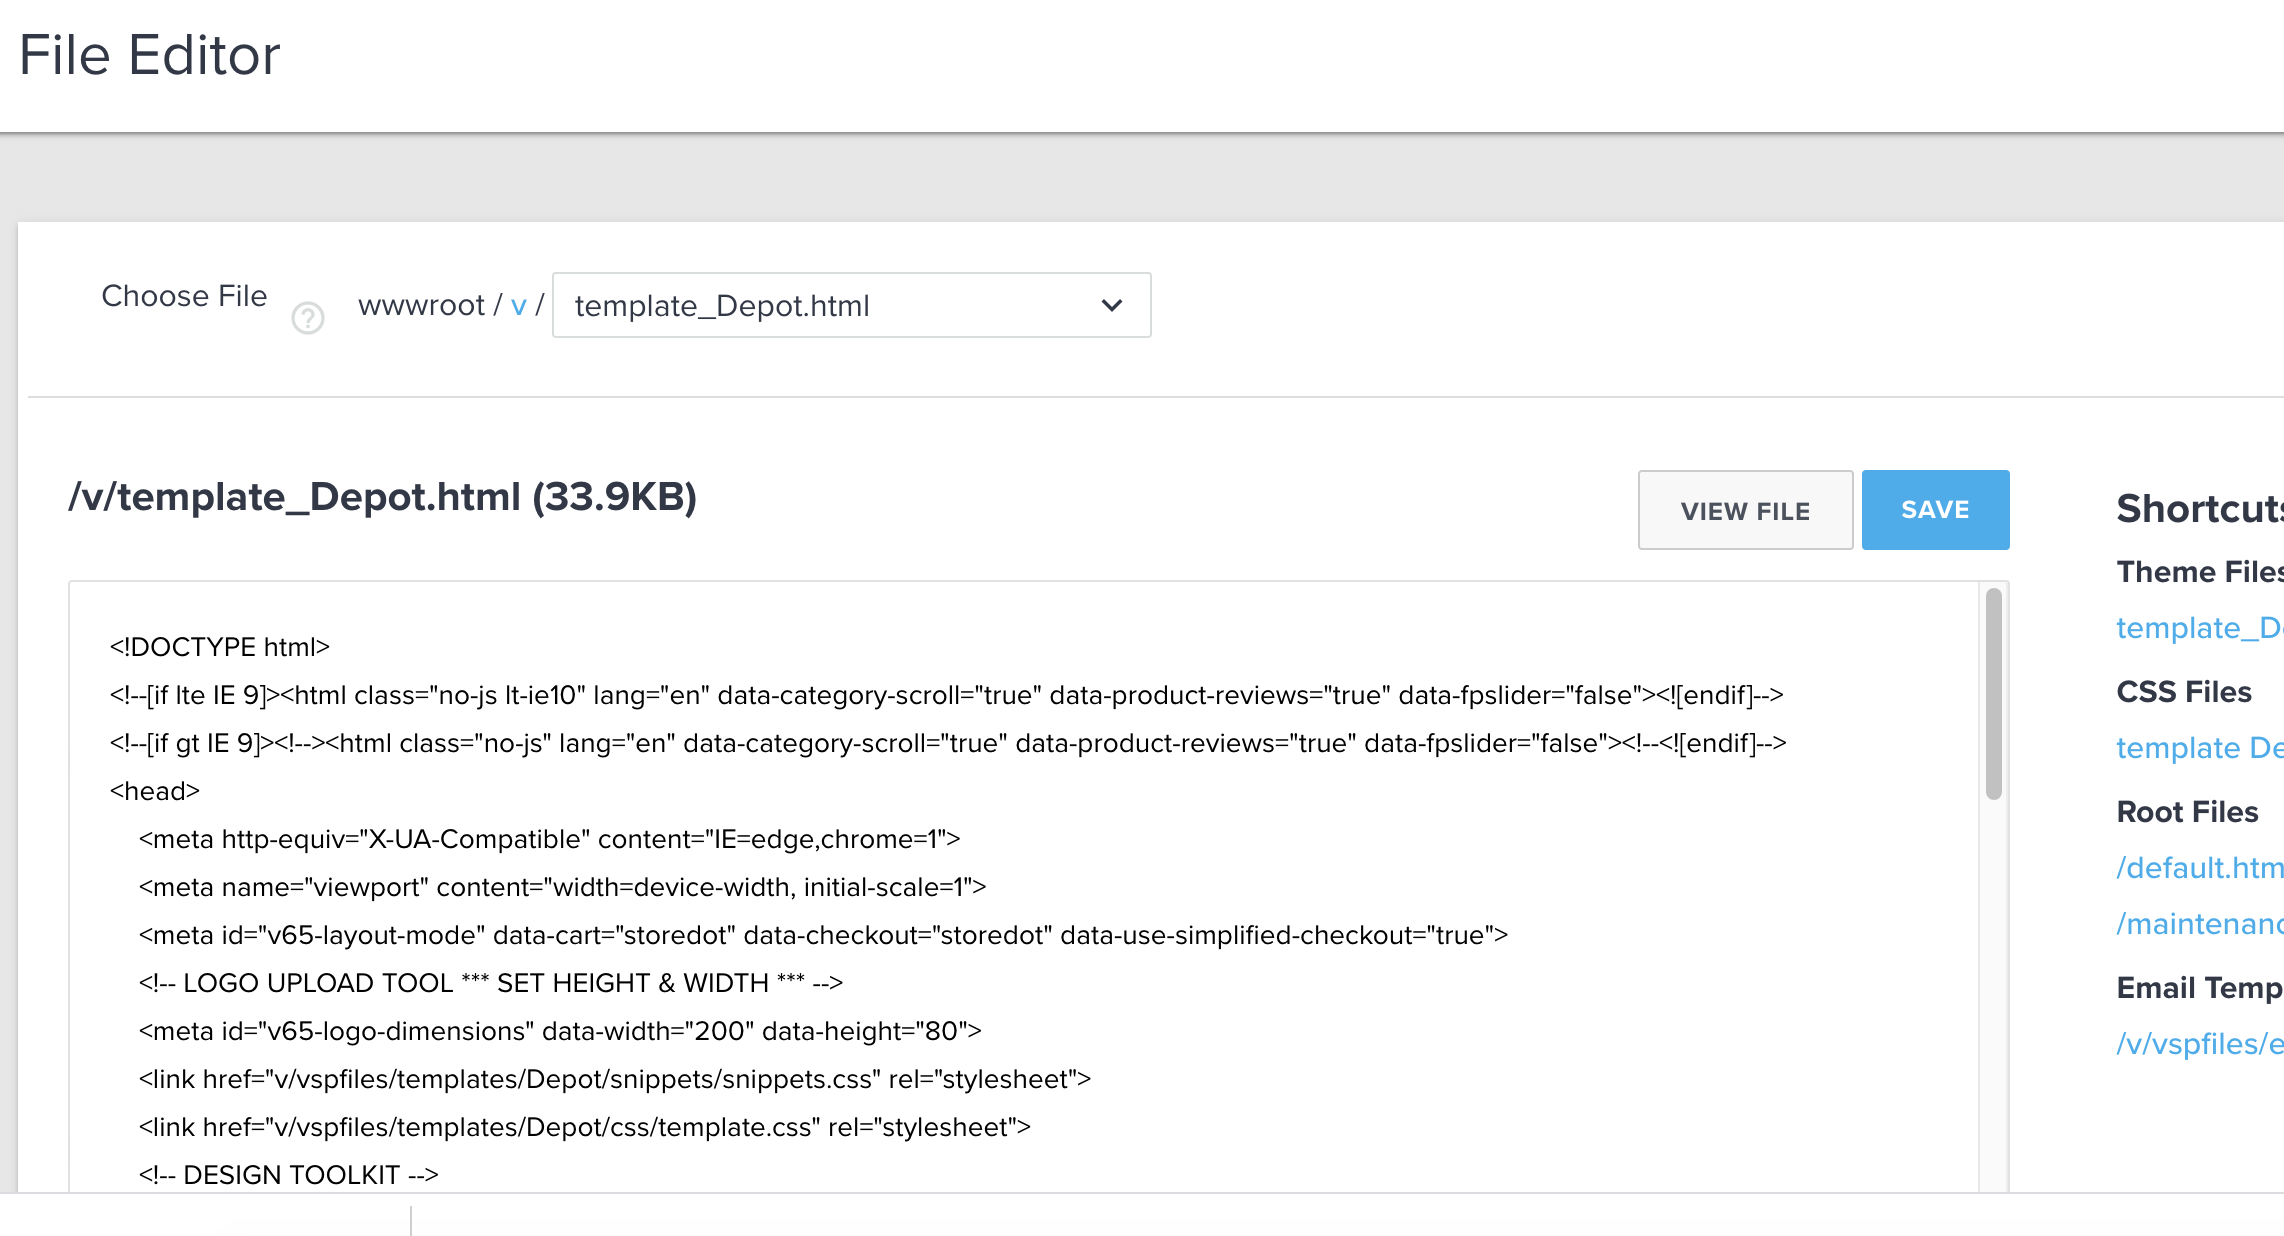
- Click on DESIGN, then File Editor
- Select the active template file

- At the end of the template file, right before the closing body tag, paste the javascript code, which will apply to the product and cart pages.
IMPORTANT NOTE: Read the comments in the code below carefully. You will most certainly have to change the javascript slectors to properly select the correct locations and data in the template you have chosen.
<script>
var Page = PageName() || 'default.asp';
//*************************
// Applies to Product Pages
//*************************
if(Page === 'productdetails.asp') {
    //Here, you will search for the element after which you would like
    //to insert the APPROVE button. The exact ID/class/tag will depend on
    //your specific template. In this example, we are adding the APPROVE
    //button after the Wish List button.
    var wishlist = $('#v65-product-wishlist-button');
    //This is just making sure the element selecte above was found.
    if(wishlist){
        //The price and model will also depend on your template.
        var price = $('[itemprop="price"]').attr('content');
        var model = $('#v65-product-parent').find('[itemprop="name"]').text();
        //The Wish List button was enclosed in a table. We will add our own button after it.
        var table = $('#v65-product-wishlist-button').closest('table');
        //Here is the button we are adding to the page.
        var new_button =/*html*/`
        <br/>
        <table style="text-align:center;">
            <tbody>
                <tr>
                    <td>
                        <button type="button" class=" btn btn-default btn-lg btn_addtowishlist" style="display:none;"
                            approve-function="embedded_app"
                            approve-action="add_to_app"
                            approve-model="`+model+`"
                            approve-qty="1"
                            approve-item-type="new_product"
                            approve-price="`+price+`"
                        >
                            <span
                                approve-function="teaser_rate"
                                approve-total="`+price+`"
                                approve-teaser-prefix="Finance As Low As $"
                                approve-teaser-suffix="/mo."
                            ></span>
                        </button>
                    </td>
                </tr>
            </tbody>
        </table>
        `
        //This line adds the button to the page.
        table.after(new_button);
    }
}
//*********************
// Applies to Cart
//*********************
if(Page === 'shoppingcart.asp') {
    //There may be several items in a cart. We will find them and add them to the items array.
    var items = [];
    //We need a total so that we may provide a finance teaser rate.
    var total = 0;
    //Each cart item is in a table row. Be careful as there are more rows than items. Some rows will have
    //irrelevant information. The code below deals with this problem gracefully.
    //For each row in the cart table...
    $('#v65-cart-table').find('.v65-cart-details-row').each(function(){
        //Find the model and price
        var model = $(this).find('table:eq(0)').find('.cart-item-name:eq(0)').text().trim();
        var price = $(this).find('table:eq(1)').find('td:eq(0)').find('.carttext').text().trim();
        //Clean the price.
        price = price.replace(/\$/,'');
        price = price.replace(/,/,'');
        //Get the quantity
        var qty = $(this).find('input').val();
        //Add it to the items array.
        if(model && price && qty){
            //Accumulate the totals for the cart.
            total += (parseFloat(price) * parseFloat(qty));
            items.push({
                model:model,
                price:price,
                quantity:qty,
                type:'new_product'
            });
        }
    });
    //Now that we are done iterating through the items in the table, lets make sure we have at least one item before dropping the button on the page.
    //Volusion will refresh the page if anything changes, so we don't have to worry about items showing up later.
    if(items.length>0){
        //Find the element after which we want to add our button.
        var table = $('#v65-cart-checkout-parent').find('form');
        //Put the button code together.
        var new_button =/*html*/`
        <br/>
        <table style="text-align:center;">
            <tbody>
                <tr>
                    <td>
                        <button type="button" class="btn_checkout_guest btn btn-primary btn-lg btn_checkout_guest" style="display:none;"
                            approve-function="embedded_app"
                            approve-action="add_to_app"
                            approve-items='`+JSON.stringify(items)+`'
                        >
                            <span
                                approve-function="teaser_rate"
                                approve-total='`+total+`'
                                approve-teaser-prefix="Finance As Low As $"
                                approve-teaser-suffix="/mo."
                            ></span>
                        </button>
                    </td>
                </tr>
            </tbody>
        </table>
        `
        //Add the button to the page.
        table.after(new_button);
    }
}
</script>
<!-- ************************************* -->
<!-- ADDED BY KWIPPED END***************** -->
<!-- ************************************* -->
Options
Some Volusion products may have options. This is an example of how I created code to read and use options. This was placed in the product page code above.
if($('#options_table').length && $('#options_table').find('SELECT').length){
    $('#options_table').find('SELECT').change(function(){
        var text = $(this).find(":selected").text();
        var price_regex = /(.*)\s\[Add \$(.*)\].*$/
        var price_found = text.match(price_regex);
        if(price_found){
            var new_model = model + " - " + price_found[1];
            var new_price = parseFloat(price) + parseFloat(price_found[2]);
            $('#approve_button').attr('approve-model',new_model);
            $('#approve_button').attr('approve-price',new_price);
            $('#approve_teaser').attr('approve-total',new_price);
        }
        else{
            var new_model = model;
            var new_price = parseFloat(price);
            $('#approve_button').attr('approve-model',new_model);
            $('#approve_button').attr('approve-price',new_price);
            $('#approve_teaser').attr('approve-total',new_price);
        }
    });
}